In this example, a template will be created for a letter confirming normal test results.
Type the surgery address on the top right of the template. Note that the options on the top of the screen are similar to the options on word processors such as Microsoft Word or OpenOffice. Text can be aligned to the right hand side of the letter template by using the Right Justify option.

Press Enter to add a line break and click Left Justify to align the next part of text with the left hand side of the letter template.
Click the Mail Merge tab.

Following a formal letter layout, the addressee's details appear next. These details change depending on which patient the letter relates to.
The Insert Merge Field drop-down is located under the Mail Merge tab. To add a merge field to the template, click the Insert Merge Field button.

Available merge fields are County, Current Date, Current Time, DOB (Date of Birth), Email, Forename, Home Telephone, House (house name), Locality, Login User (the name of the user logged in when a merge template is used), Mobile, NHS Number, No / Road (house number and street name), Postcode, Reg GP, Reg Status, Surname, Title, Town and Usual GP.
Using the merge fields, add the recipient's name and address. Insert the Current Date field afterwards.

|
Note: Remember to add spaces between the merge fields.
|
Complete the template using Insert Merge Field and free text (for example, "I am pleased to confirm in writing that your test results were normal").

Docman prompts for a name for the new template. Enter an appropriate name for the new template and click OK.

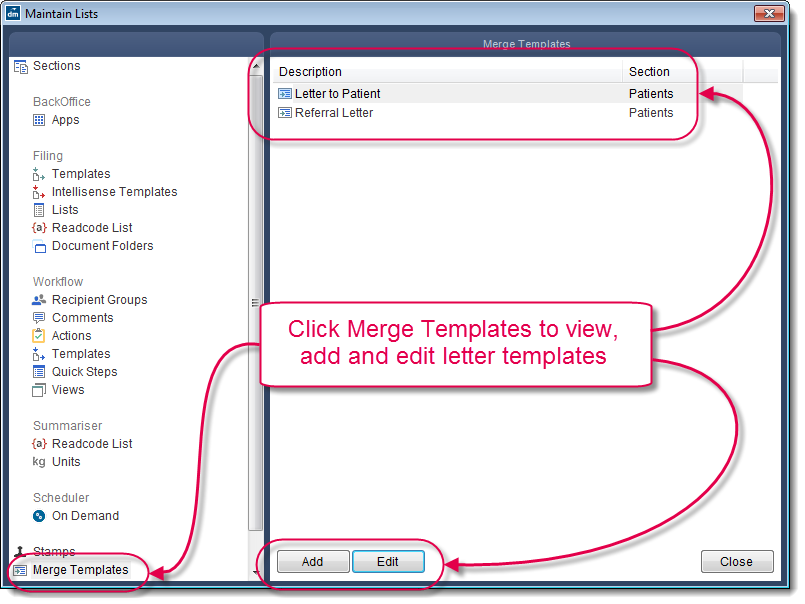
Docman returns to the template configuration. Close this to return to the Maintain Lists screen.