Breadcrumbs Proxy:
Topic Body Proxy:
Ref: DGP-FIL01
Begin by clicking the “File Documents” tile on the Docman main menu to access Batch Manager.
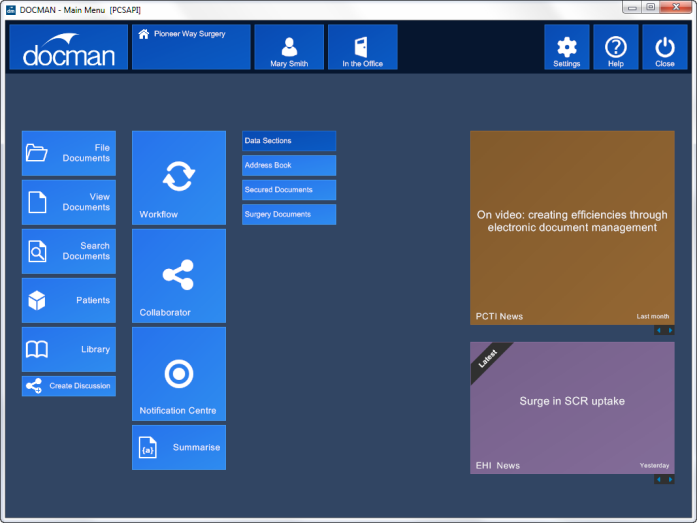
To scan a paper document, use the “Scan” button on the top of the screen. To import a document from another location on the PC, click the “Capture” drop-down menu and select “Capture Existing Document”. Read the Scanning Into Docman user guide for more information on Docman's scanning interface.
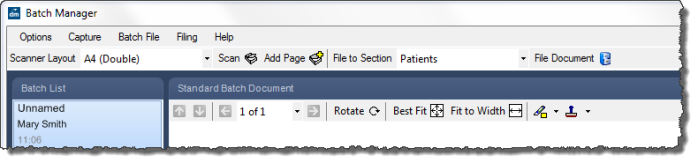
In this example, a document is already waiting ready for filing.
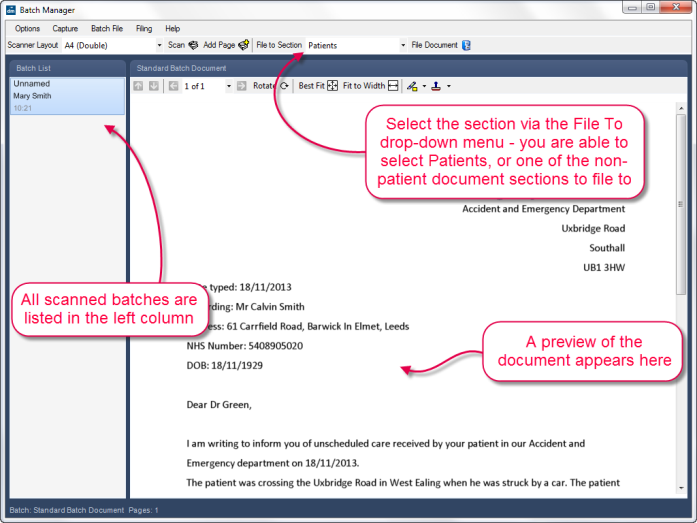
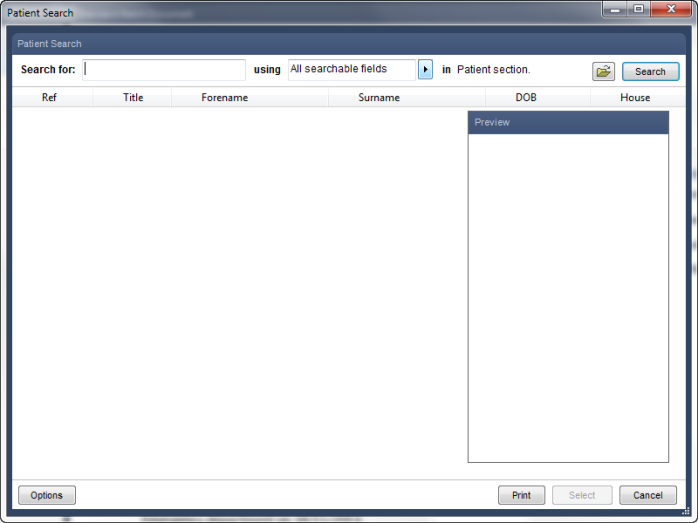
To begin the filing process and enter the document into a patient’s record, click the “File Document” button. The patient search screen opens; you can now select the patient to file the document under.
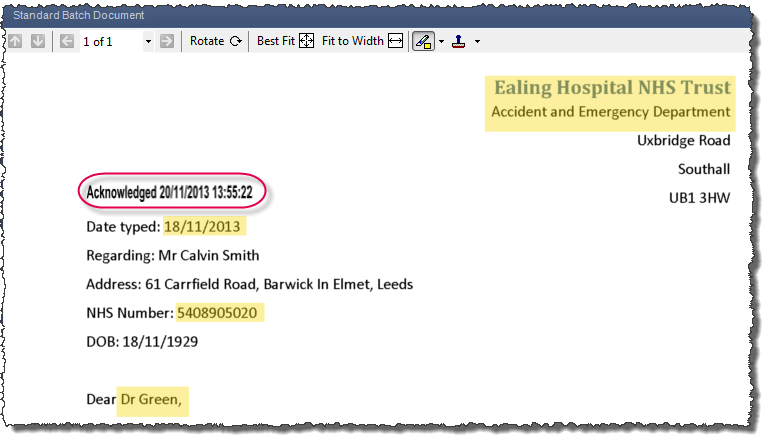
The example document is an A&E letter regarding Calvin Smith. Docman’s patient search finds patients using any available details; name, date of birth, address, telephone number, NHS number or clinical system reference. In this case, we have performed the search using the patient’s surname.
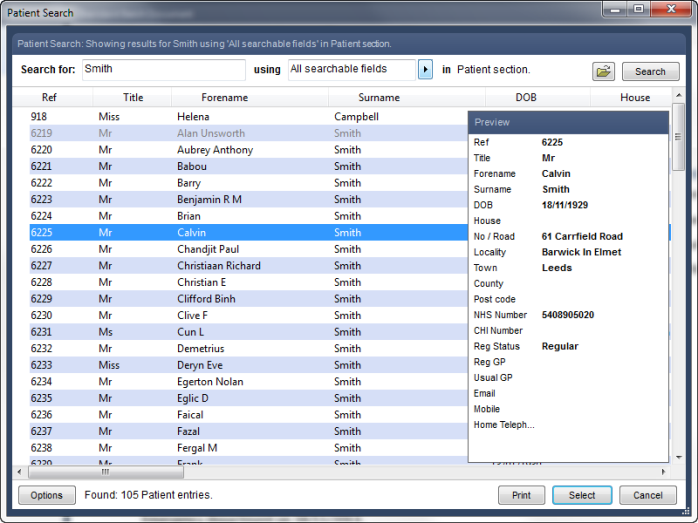
There are many patients with the surname Smith, but the correct patient can be identified by their other details. Single-click one of the listed patients to highlight them and bring their details up in the preview. Alternatively, search for the patient’s full name or date of birth to narrow the search down.
Double-click the patient for filing to select or highlight the patient and click Select.
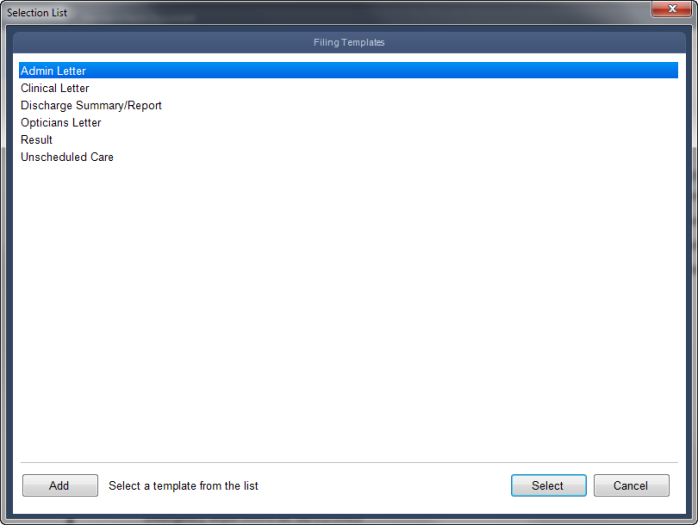
The Selection List window opens. Calvin Smith’s document is an unscheduled care letter, so this is selected. Single-click an item from each list to select this option.
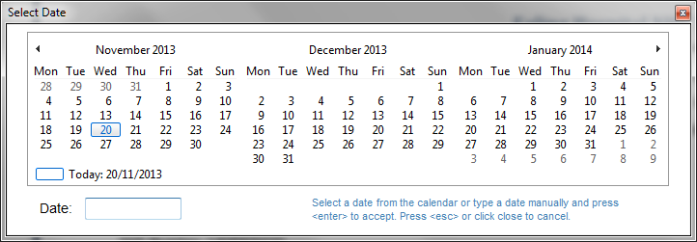
The Select Date window opens. This automatically centres on the present date. Calvin Smith’s encounter took place on 18/11/2013, so this is the date you should select.
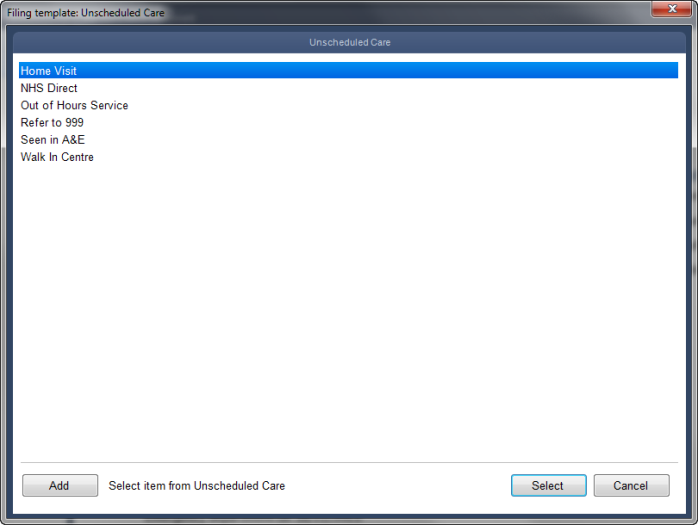
You may also be prompted for the hospital and department, depending on the template you selected at the beginning of filing. Docman prompts you for a specific type of unscheduled care for this letter. Calvin Smith received emergency surgery in Accident & Emergency, so “Seen in A&E” is the correct option to select.
Docman records these details in its patient records and allows you to arrange, search and audit documents based on their content.
The final filing screen presents you with a summary of the selected document options, as well as settings for document security and where the document will go when filed.
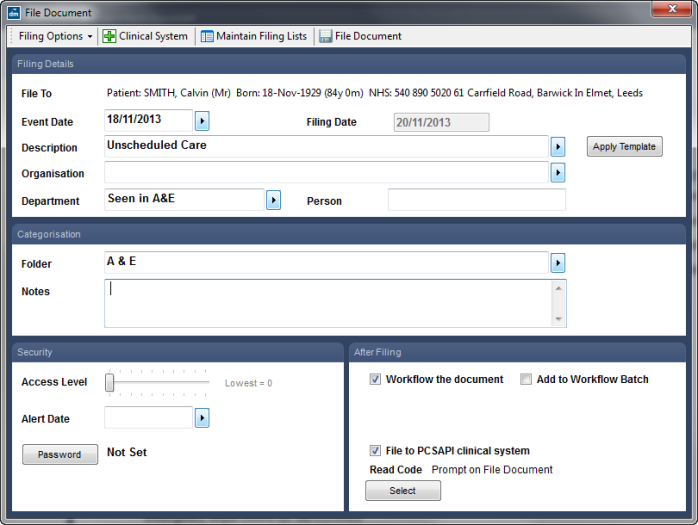
If you have made any mistakes in the selection lists, you can use the Apply Template button to re-select the filing templates.
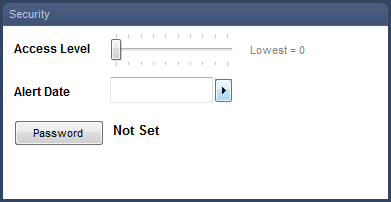
The Access Level slider allows you to set a minimum access level that you must have to view the document.
Setting an Alert Date notifies you on the set date that the filed document needs attention or reviewing.
The Password option allows you to set a password to protect the document.
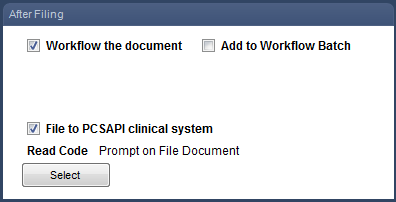
The After Filing section on the bottom-right shows you what will happen to the document after it is filed into Docman.
Workflow the document brings up the workflow selection screen after filing, so you can send the document to another user’s workflow intray for review and actioning.
Add to workflow batch adds the document into a batch of documents ready to be workflowed, allowing you to file multiple documents and workflow them all in one. If you have an active workflow batch, you can process this from Batch Manager by going into the Filing drop-down menu and clicking “Process Workflow Batch”.
File to PCSAPI clinical system transfers the document into the EMIS PCS clinical system. The actual wording of this option varies depending on your site’s clinical system; for example, an EMIS Web site gives you the option to “file to EWEBAPI clinical system”.
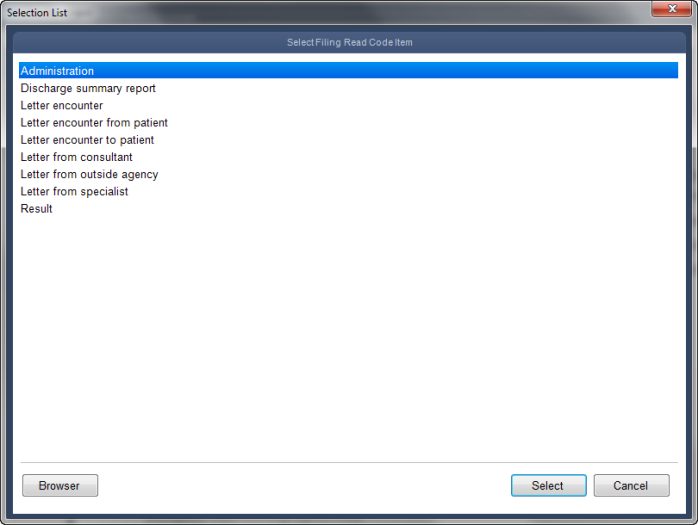
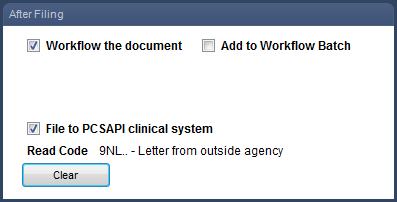
Docman also adds a read code into the clinical system alongside the filed document. Filing templates can be set up to use a default read code, or the Docman system will prompt you to select the read code at the end of filing. In this case, Docman is set up to prompt for the read code. You can click Select to select a read code before finishing the filing process.
|
It is important to ensure that the "File to Clinical System" tickbox is ticked; if it is left unticked, your document will NOT go into the clinical system! |
Click “File Document” on the top-right of the screen to file the document into Docman’s patient records. When you file the document, Docman will present you with other screens based on what you selected on the final filing screen (workflow route, read code selection).
Docman will return you to Batch Manager after filing, and the filed document disappears from Batch Manager.
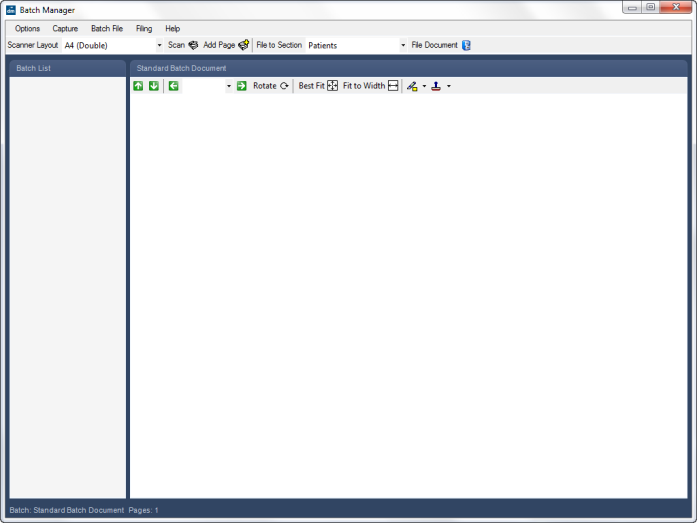
Batch Manager allows you to customise aspects of the scanning and filing process according to your preferences.
The Layout drop-down menu presents you with a number of preset scanning layouts. These alter the size and quality of the scans.
When you use the Scan button, Docman creates a new batch for the newly scanned documents. Add Page scans the documents and adds them to the selected batch, allowing you to rescan one particular page without rescanning the entire batch.
In addition to the patient documents, Docman features a Library section for non-patient documents. The File to Section drop-down menu allows you to select one of these sections for filing. When filing into the non-patient sections, Docman will not ask you for patient-specific details such as patient name.
Rotate allows you to spin the document 90 degrees.
Best Fit and Fit to Width control your view of the document. Best Fit displays the entire selected page in the preview window. Fit to Width zooms in so the width of the document fills the preview window, which usually means you must scroll down to see the second half of the document, but makes the text easier to read. Please note that these options do not alter the document itself; the document remains the same size.
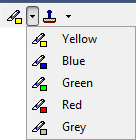
The Highlight and Stamp tools allow you to add annotations to the document before filing. Click the tool button to select the tool. Click the arrow to the right of the tool button to select the highlight colour, or the stamp to use.
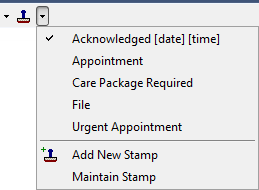
The [date] and [time] text on a stamp is dynamic, and adds the current date and time to any document you use it on.
Click and drag to create highlights on the document, or click to stamp the document.
Multiple pages can be added to the same batch by scanning them all in one, or by using the Add Page function.
Batch manager displays icons representing each page to the left of the document preview. You can click any page in this list to show it in the preview pane.
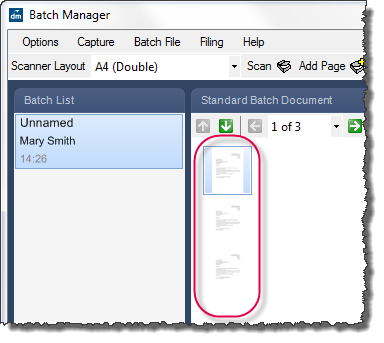
You can select multiple pages in a batch by holding the CTRL key and clicking the icon for each page. This allows you to file multi-page documents into a patient’s records.
Documents can be deleted from Batch Manager by right-clicking the batch entry under Batch list.
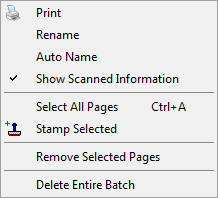
Click Delete Entire Batch to delete all documents, as well as the batch entry itself. Click Remove Selected Pages to delete the selected pages and retain the others. You can also print or rename the batch, select and stamp all pages and toggle the auto name and scanned information on and off from this menu.
Mini-ToC Proxy:
Topic Toolbar Proxy:
OutPut ToC Proxy:
Menu Proxy: